In our fast-paced and competitive society, many people want to complete their work efficiently. Thus, people
used to use pen to record key in the work and now in order to speed up the efficiency
people adopt voice memos.
“How can I get the voice memos back which I accidently deleted on my iPhone 6S Plus, please help and tell me how to do, thanks a lot!”

However, have you deleted your voice memos accidentally? Have you bothered by lost voice memos from your iPhone? Here, in this article, I will be honored to teach you how to recover your lost voice memos. Actually it’s very simple, just need a software, iPhone Data Recovery.
iPhone Data Recovery combines many functions in one. It can help you extract your data, such as SMS, photos, contacts, notes, calendars, reminders, voice memos and all the contents that you can think of from your iOS devices, iTunes and iCloud easily. Also, iPhone Data Recovery is an expert for WhatsApp data transfer, can helps to backup & restore your phone data, as well as fixing a bricked iDevice and abnormal iOS operating system.


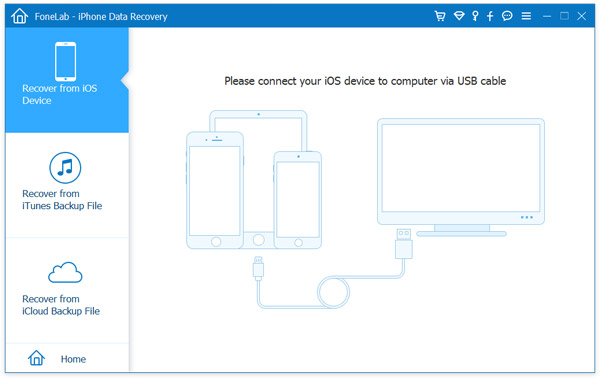
Launch iPhone Data Recovery and connect your iDevice on your PC firstly. Then choose the mode “Recover from iOS device” on the left.
Tips: Before running iPhone Data Recovery, please ensure that you have installed the latest version of iTunes on your computer. To avoid the automatically sync, do not launch iTunes when launching the program. To disable the automatical syncing in iTunes you can follow the steps here: Run iTunes > Preferences > Devices, check “Prevent iPods, iPhones, and iPads from syncing automatically”.
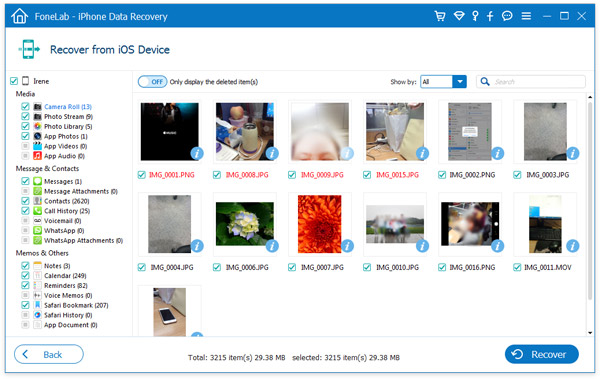
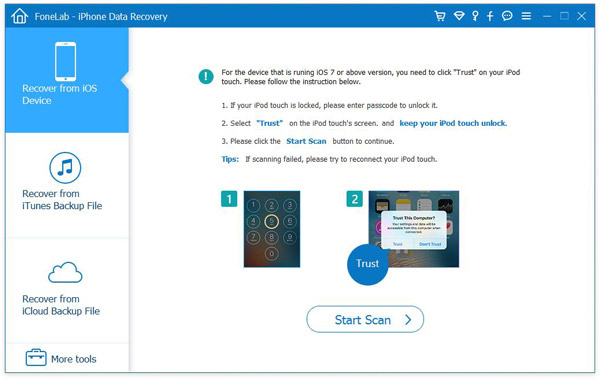
When the program recognize your device, you can select the data, whatever has beed deleted from the device or existing data on the device. Now click “Voice Memos” and click “Start Scan”. The time of the scanning will according to the amount of your data. By the way, if you see the data you want, you can pause the process.
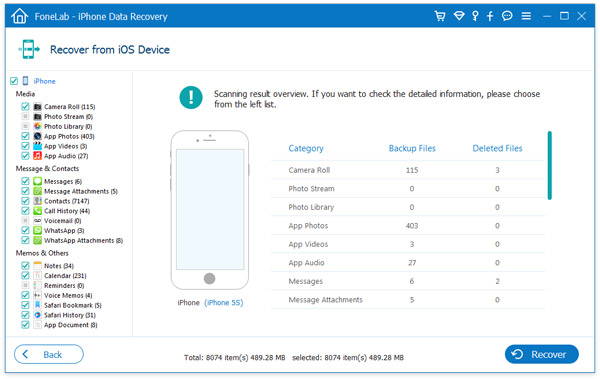
After a while, when the scanning is completed, you can preview the scan result by the program. On the left you can select the kind of files and their details will come up in the right part of the window. Check them one by one and tick them, which you are looking for. Then click the button “Recover” to save it to the computer.