In our daily life, a lot of users are in need of switching files from iPad to computer, or sync data from PC to iPad, no matter what type of iPad you using, iPad 2, iPad 4, even the lastest iPad Air 2 or iPad mini 3. However, why we need to transfer our files between iPad and computer? This can have many, many reasons, such as:
* Want to do some backup for your iPad
* Replace a fully new iPad, and want to sync the previous backup from PC
* The storage space is insufficient, wanting to transfer some data so as to make room for your iPad
* Want to transfer photos, videos to PC and share it with your friend or family
* Want to sync your contacts to PC, in order to easily manage them
* Wanna copy text messages to your computer for easy viewing at a later time
* Restore the deleted or lost file from backup
* Rebuild your entire iTunes library from your iPad
* Delete some unwanted files from iPad on PC
* And so on
Apparently, whatever situations you want to transfer data from iPad to computer, or transfer files from PC to your iPad, you just interested in how to do so with ease, doesn’t it? That’s the reason why we write this tutorial, and recommend the powerful iOS Data Manager to you.
iOS Data Manager is a full-features transfer software helps you one clcik to transfer photos, videos, music, contacts and more between iPad and computer. In other words, it can solve all the above problem relying on its own. In addition, the program allows user to directly transfer media, contacts, photos from one Apple device to another without iTunes. Can’t wait to sync and manage your data with this useful software? Firstly, download and install a Windows or Mac version on your computer, just try for free.


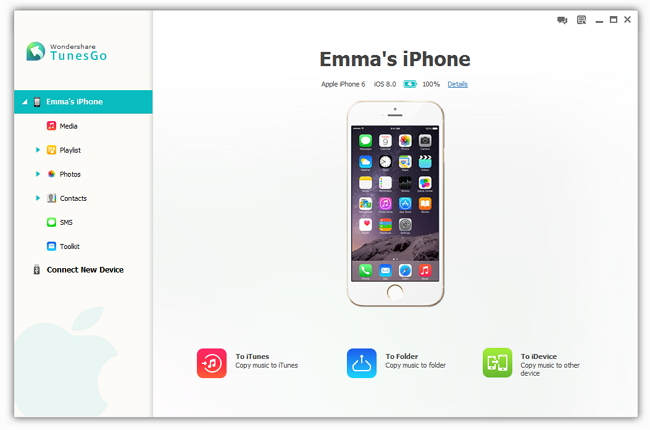
No matter you are wanting to transfer your data from iPad to computer, or back, first of all, you ought to install and launch the iOS Data Manager on your computer and then connect your iPad to computer via an Apple USB cable. The program will detect your iPad automatically soon. Once your iPad is recognized, you can see the information of your device, and the transferable option.
Note: To make sure that the software works well, please install iTunes on your PC.
In the left sidebar, you can see all the transferable file, including Media, Playlist, Photos, Contacts, SMS and so on. Here, we take the “Photos” as an example. Click “Photos” in the left sidebar, and you can see the photos or albums storing on your device, select those what you want to transfer, tap “Export to” at the top of the window, and then choose a saved path on the pop-up dialog to transfer them to your PC.
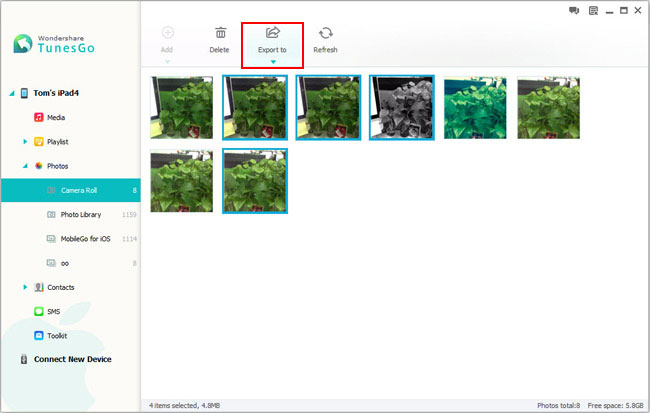
With the similar operation, you can also transfer contacts, music, playlist, videos, messages and more from your iPad to computer.
Similarly, we still take “Photos” as an example. Tap “Photos” in the left column, click the triangle under “Add” and then press “Add Folder“. Now you just need to preview and select the photos folders you want to transfer on the pop-up file browser window, click “OK”, and the program will transfer photos from your PC to iPad.
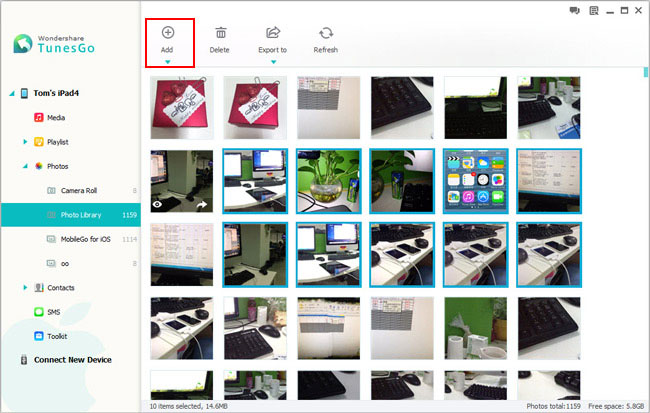
Besides, you can directly drag and drop the selected photos or folders from PC to the corresponding interface of the iOS Data Manager.
Note: Keep your iPad connected to the computer will during the whole process.