Since we used a mobile phone, we will inevitably encounter some problems in the mobile phone data. Like the problem of data transfer, we usually need to transfer data to our PC when we our phone has store too much files so that keep our device having a smooth running.
Currently, iPhone 7 has on the market, presumably many Apple fan has prepared to buy a iPhone 7. So, the first question must be the data transfer. In this article, I will recommend you two softwares to help you transfer your photos to your PC, if you want to transfer other files, their processes are similar and the operation is as simple as that.
iOS Data Recovery is a powerful software, especially for iDevices’ data recovery. It can deal with all kinds of problems that arise in your iOS devices such as iPhone, iPad and iPod touch. Besides, iOS Data Recovery not only can help you erase your private data, but also can backup & restore your iPhone data.


Step 1. Chooose the Transfer Mode
In the first, install and launch Dr.Fone for iOS, and then choose the “More Tool” on the left side of the main interface. On the next screen, there are many options, please click on “iOS Data Backup & Restore” and connect your iPhone 7 or iPhone 7 Plus to PC at the same time.
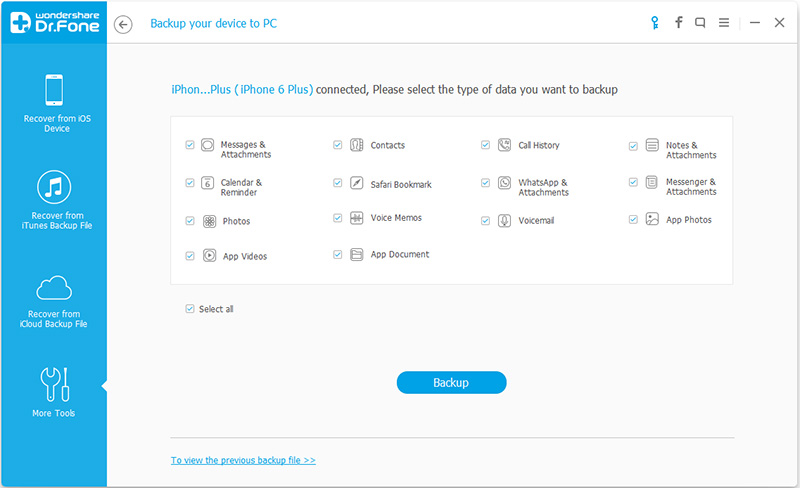
Step 2. Select File Types to Backup
Then you need to choose the file types you want, to export your iPhone photos, you just need to check the box in front of the “Photos” and click “Backup”.
The program will automatically back up all photos from your device, you can suspend or terminate the program at any time, but please do not disconnect your iPhone during the backup process.
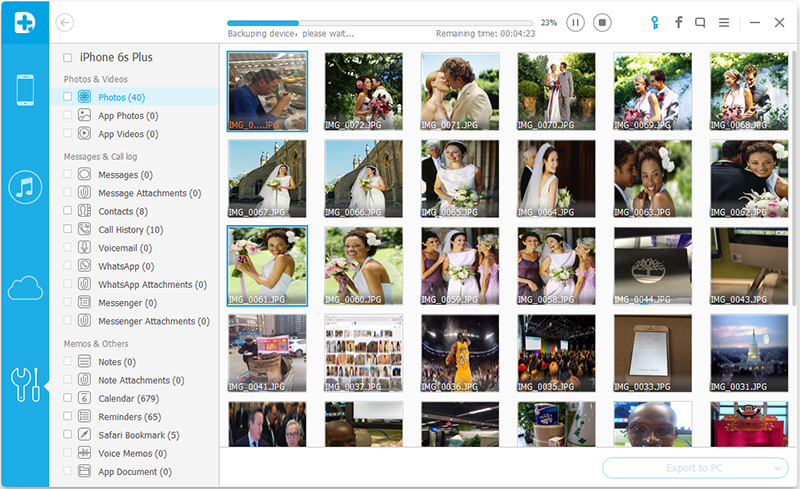
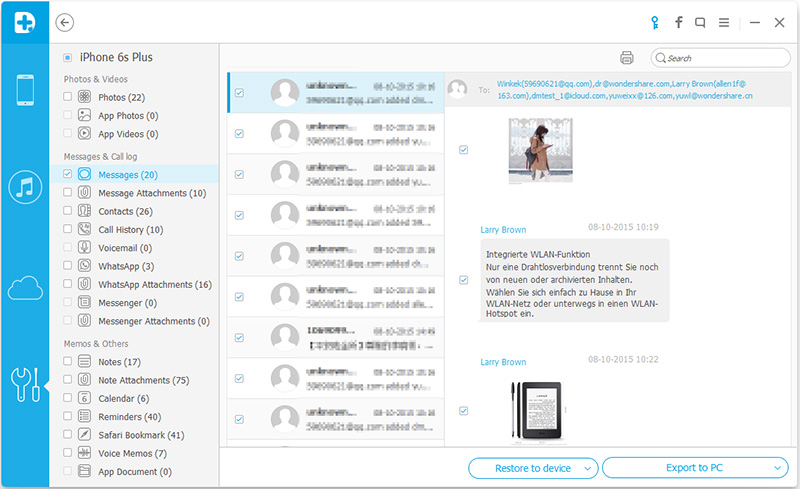
Step 3. Export the Backup File to Computer Selectively
When the backup is completed, the program will display all the backup result to you. The left side of the window is the type of files and their details will be shown on the right side when you click it. Just check mark in front of the files you need, then click “Export to PC” to sync them to your Windows computer or Mac in a click.
Mobile Transfer is a outstanding software for data transfer, it can not only transfer photos, videos, contacts, call logs, calendar or even the app data between iOS devices, but also sync your data to your computer in a click. What’s more, your transferred data could have a 100% safe environment.
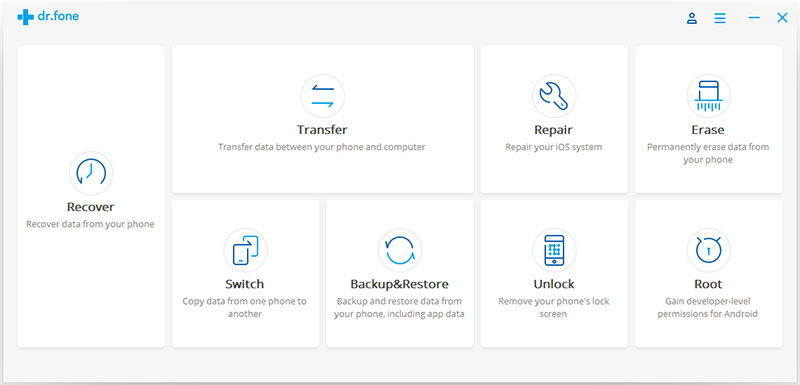
Step 1. Launch Mobile Transfer and Choose a Transfer Mode
Firstly, you need to download, install and launch Mobile Transfer. Then, its main interface will display four functions for you and you should click “Back Up Your Phone”.

Step 2. Connect Your iPhone to Computer
When the program enter next interface, you need to connect your iPhone 7 or iPhone 7 Plus to your computer with USB cables, the program will detect your phone soon.
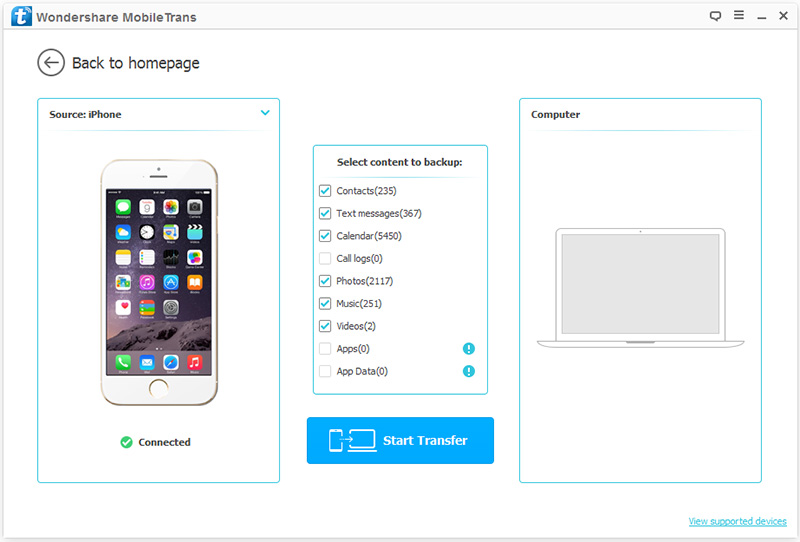
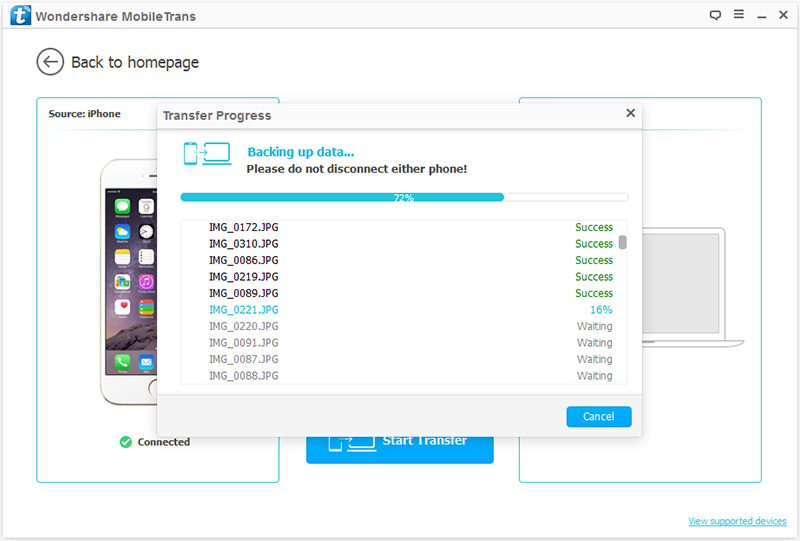
Step 3. Backup the Selected File to PC
When your iPhone is recognized, the contents list will show you the files can be transferred. Just check the box in front of “Photos” or other file you need. Then click the “Start Transfer” button to begin the transfer process. Surely, you can choose the storage directory
by yourself by going to the setting.